

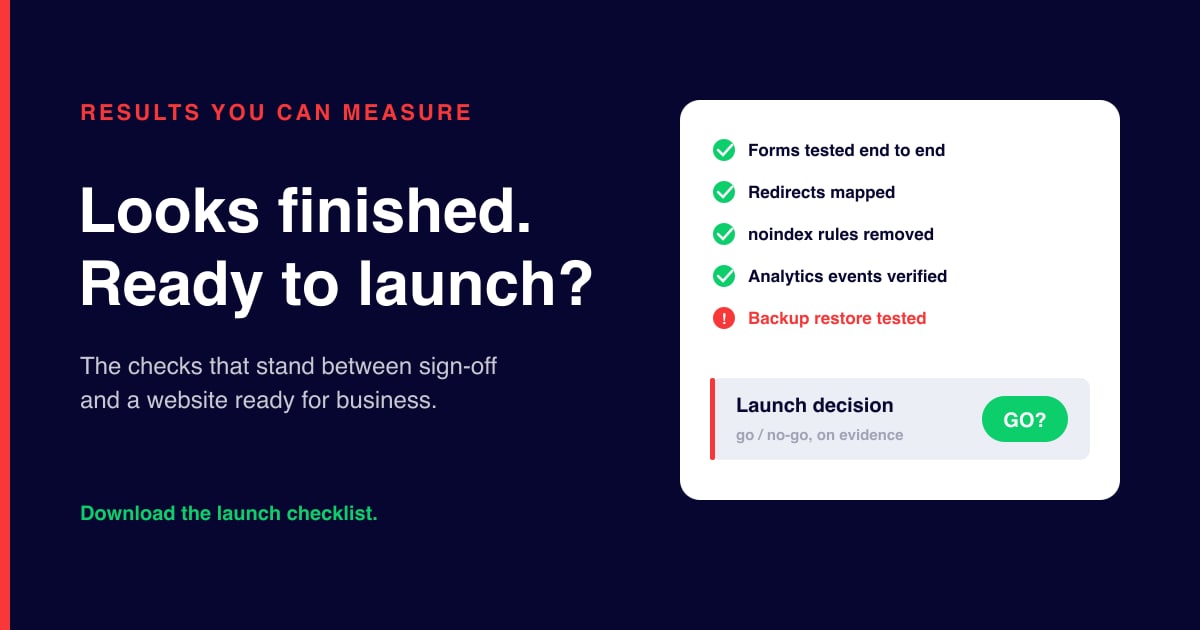
The design is approved. The photographs look sharp. Someone has finally stopped asking whether the logo could be a little bigger.
Your new website is ready.
Well, it looks ready.
There is a difference, and it usually reveals itself at an inconvenient moment: when the first customer submits an enquiry that never arrives, an old link leads nowhere, or somebody asks how many leads the new site has generated.
At which point, everyone looks thoughtfully at someone else.
A finished design is an important milestone. But a website is not simply a collection of attractive pages. It is part of your marketing, your customer service and, potentially, your sales operation.
Before launching, you need to know that those parts work together.
This website launch checklist explains what to check, why it matters and where getting the right help can save you a great deal of avoidable bother.
Because “it looked fine on my laptop” is not much of a launch strategy.
Design approval is not launch approval
Good design matters. It helps communicate your brand, organise information and give visitors confidence.
But approving the design answers one question: are we happy with how this looks and presents the business?
It does not automatically answer:
- Can customers complete the important tasks?
- Will enquiries reach the right people?
- Have we protected the useful parts of the old website?
- Are privacy controls doing what they claim?
- Can we measure meaningful results?
- What happens if something goes wrong?
Think of a new restaurant. The décor is lovely, the menus are printed and the lighting makes everyone look ten years younger. You would still check that the kitchen works before opening the doors. A website deserves the same courtesy.
The purpose of pre-launch testing is not to delay a project indefinitely. It is to distinguish between an irritating snag and something that could stop the website doing its job.
1. Start with what the website needs to achieve
Before discussing sitemaps or image compression, ask a simpler question. What should this website help your business achieve?
For a consultancy, that might mean qualified enquiries. For a retailer, completed orders. For a service business, bookings, calls or quotation requests. Those outcomes should shape the checks.
A beautifully presented service page still needs to explain who the service is for, what problem it solves and what the visitor should do next. We have written a full anatomy of a service page that wins the enquiry if yours need more than a quick review.
Review your important pages and ask:
- Is the offer clear without a guided tour?
- Does the visitor understand why it matters to them?
- Is there enough evidence to build confidence?
- Is the next step obvious and appropriate?
Not every visitor is ready for a sales conversation. Some need a useful explanation, a relevant example or an answer to a practical question first. The objective is a clear route forward, not a “Contact us” button scattered around like confetti.
2. Test the customer journey, not just the individual pages
Clicking through the navigation is a start. It is not the whole test.
Try completing the tasks a genuine customer would attempt. Find a service. Compare options. Check a delivery policy. Download a document. Book an appointment. Ask a question.
Begin on different pages, too. Visitors do not necessarily enter through the homepage and politely follow the route you imagined.
Give somebody unfamiliar with the project a realistic task and watch what happens. Avoid explaining where to click. If the website needs you standing beside it, narrating the experience, something needs attention.
Check telephone links, search results, navigation, downloads and error pages.
For ecommerce or booking websites, test unsuccessful journeys as well as successful ones. What happens when a payment fails, a slot becomes unavailable or somebody makes a mistake? A useful website helps people recover. It does not simply announce that they have done something wrong.
3. Submit every form and follow the enquiry
A form that displays correctly is not necessarily a working form. Submit it. Then follow what happens next.
Does it validate the information properly? Does the visitor receive a clear confirmation? Does the message arrive in the correct inbox? Does the enquiry reach the CRM, if there is one?
Test attachments, required fields and spam protection where relevant.
Also check the human handover. Who receives the message, and who responds when that person is away?
Imagine a new website generating several promising enquiries while every notification quietly disappears into an unmonitored mailbox. The marketing appears ineffective. The sales team sees no improvement. The actual problem is hiding between “Submit” and “Inbox”.
For online purchases, extend the same thinking to order confirmations, stock updates, payment records and refunds. Test the process from the customer’s action to the business’s response. That is the journey you are launching.
4. Check mobile usability with an actual phone
Shrinking a browser window is useful. It is not a substitute for using the website on a phone.
Pick one up and try the important journeys. Can you open and close the menu comfortably? Read the text? Complete the form without wrestling with the keyboard? Dismiss the cookie controls without accidentally selecting something else?
Check whether sticky banners cover buttons, whether tables disappear off-screen and whether embedded booking tools behave. Test representative devices and browsers rather than assuming one successful visit proves everything.
The same applies to performance. Review your important page types, images, scripts and embedded tools, not just an unusually lightweight homepage. A site can look swift on the office connection and feel rather less enthusiastic elsewhere. We have covered why website speed matters for small businesses in detail.
Use performance tools to identify problems, then check the real experience. The aim is not an impressive screenshot of a test score. It is a website people can use without losing patience.
5. Make accessibility part of the launch checks
Accessibility is not a box labelled “alt text” at the bottom of an SEO checklist. It concerns whether people can understand and operate the website, including people using keyboards, screen readers, magnification or other assistive technology.
Practical checks include:
- Navigating without a mouse.
- Seeing which link or control has keyboard focus.
- Reading text with sufficient contrast.
- Enlarging content without losing functionality.
- Understanding form labels and error messages.
- Accessing appropriate alternatives for images, audio and video.
The W3C’s introductory Easy Checks for web accessibility cover these areas, while explicitly warning that passing a few simple checks does not establish comprehensive accessibility. That distinction matters. An automated report is useful evidence, not a certificate that every visitor will have a good experience. Include manual testing and identify when specialist assessment is needed.
A form that looks elegant but cannot be completed by part of your audience is not finished. It is simply attractively unfinished.
6. Check search visibility without treating SEO as magic
A website launch checklist should absolutely include technical SEO. But “add the SEO bits” is not a particularly useful instruction.
Check that important pages are accessible, that their content is meaningful, and that titles, headings and internal links help explain what each page is about.
Verify canonical URLs, the signals identifying your preferred page addresses, and check that the production sitemap contains the intended live URLs.
Development settings deserve particular attention. Google’s site migration guidance specifically highlights temporary noindex rules, crawler blocks and incorrect canonical URLs as things to review when moving a site into production. The instruction is not “remove every restriction”. Some pages may deliberately remain excluded.
Likewise, structured data should describe relevant content accurately, not be pasted everywhere because somebody promised an SEO shortcut. Google’s structured data documentation recommends testing supported markup during development and monitoring it after deployment.
Get the foundations right. Google’s guidance for its AI search experiences also points back to core requirements: accessible pages, successful responses and indexable content. A new acronym does not remove the need for a functioning website. We have written separately about how to get your content quoted by AI search once the foundations are in place.
The 20 technical SEO checks before launch
These are the items we run through on every launch. The downloadable checklist gives each one two lines of detail plus space for an owner and evidence.
Crawling and indexing
- Build sitemap.xml, listing only live, canonical, indexable URLs, and reference it from robots.txt.
- Add robots.txt, allowing the crawlers you want and removing any leftover blanket block from staging.
- Remove noindex tags from pages that should rank. Keep deliberate exclusions and record why.
- Add canonical tags pointing at the live domain, never at the development site.
- Verify Search Console ownership and submit the production sitemap.
On-page basics
- Add meta titles: unique, specific and front-loaded, one per page.
- Write meta descriptions: a specific pitch for the click, not a keyword list.
- One H1 per page, matching what the page is actually about.
- Fix heading order: H2s under the H1, H3s under H2s, no skipped levels.
- Add alt text describing what each image shows, with empty alt on purely decorative ones.
- Clean up URL slugs: short, lowercase, readable, and never renamed without a redirect.
Structure and signals
- Add schema markup that matches what is visibly on the page, then test it.
- Add internal links from body copy with descriptive anchor text, not just menu links.
- Fix broken links before launch, including links that point at redirected URLs.
- Add an og:image so shared links show a proper card rather than a random crop.
- Add llms.txt, a plain-text map of your key pages for AI assistants. Cheap to add, early days, worth having.
Speed and usability
- Compress images and serve them at sensible sizes with width and height set.
- Check Core Web Vitals on key templates using a real phone, not just the homepage on office wifi.
- Fix mobile layout issues: no sideways scrolling, tap targets big enough, forms usable.
- Enforce HTTPS with a valid certificate and no mixed-content warnings.
7. Replacing a website? Protect what already works
A redesign is not a blank sheet of paper. Your existing website may have useful search visibility, bookmarked pages, external links and landing pages supporting campaigns. Those assets need consideration before addresses change or content disappears.
Record the current URLs. Identify important pages. Decide what stays, what improves and what genuinely needs retiring. Where URLs change, map old addresses to relevant replacements.
Google recommends permanent server-side redirects where possible, updating internal links and avoiding unnecessary redirect chains. Its migration guidance also advises against sending lots of unrelated old pages to an irrelevant destination. In other words, “redirect everything to the homepage” is not a migration plan. Nor should “tidy the URLs” become a reason to rename established pages without understanding the implications.
Take a baseline of search and business performance before launch, then monitor afterwards. A redesign should build on what the business has earned, not accidentally sweep it away with the old colour scheme.
8. Make privacy controls work, not just appear
Installing a cookie banner does not, by itself, settle your privacy obligations. You need to understand what the website collects, which technologies it uses and what happens when somebody exercises a choice. That includes analytics, advertising tags, embedded videos, chat tools and third-party integrations.
For UK websites, the rules depend on purpose and configuration. The ICO’s guidance on storage and access technologies describes a narrow statistical purposes exception for certain analytics, with conditions including clear information and a simple, free means of objecting. It is not a blanket exemption for analytics tools. Advertising-related storage and access still requires consent.
This is why copying another website’s banner is a poor starting point.
Test the actual behaviour:
- What runs before a choice?
- What changes after acceptance or refusal?
- Can people change their mind?
- Does the privacy information reflect reality?
Seek specialist advice where the circumstances warrant it. A polished notice should describe a considered approach, not disguise an unexamined collection of scripts.
9. Decide how you will measure success
“Analytics is installed” and “we can measure results” are different statements. Before launch, agree what success looks like and how you will recognise it.
For a lead-generation website, that could include successful enquiry submissions, bookings and qualified leads. For ecommerce, it might involve completed purchases, revenue and the steps leading to checkout.
Then test the measurement setup. Check the correct accounts and properties, duplicate tags, event behaviour and the interaction with privacy choices.
Be precise about what each event means. A click on a telephone link is not proof that a conversation happened. A click on “Submit” is not proof that a valid enquiry reached the business. Useful reporting makes those distinctions clear. Some outcomes also need connecting to business records, rather than relying entirely on website analytics.
You do not need a dashboard resembling mission control. You need trustworthy information that helps answer: what is working, what is not, and what should we improve next? We have covered what marketing reports should actually tell you separately.
10. Check security, backups and your way back
HTTPS belongs on the checklist. So do access controls, software maintenance and recovery.
For a WordPress website, we would include a review of administrator accounts, plugin and theme updates, unused components and backup arrangements. Other platforms have their own configuration, deployment and access considerations.
The question is not whether the site has a particular security badge. It is whether the relevant risks have been considered and responsibilities are clear.
Backups deserve special attention. This is the bread and butter of our hosting and maintenance work, and the questions are the same whoever hosts you. What is included: files, database, configuration? Where is the backup held? Who can restore it? Has restoration been tested?
Agree the rollback process before launch. If something serious fails, you need to know who makes the decision, what triggers it and how the previous working version will be recovered. “We assume the hosting company has something” is not quite the reassuring answer it first appears. Recovery planning is much less dramatic when done before you need it.
11. Treat launch day as a process, not a button
The technical switch is only part of launching. Agree a launch window, identify who is available and assign somebody to make the go/no-go decision.
Where possible, avoid launching immediately before the people who understand the site become unavailable. Friday afternoon is a wonderful time for many things. Discovering an obscure production problem is rarely one of them.
Verify domain settings, HTTPS, production credentials, redirects and integrations. If DNS changes are involved, check that existing email arrangements are preserved.
Then repeat the important tests on the live website. The staging version passing yesterday does not prove the production version passes today. Submit a real enquiry. Check its arrival. Test a booking or transaction where appropriate. Verify that intended pages are accessible and that monitoring reaches the right person.
Document unresolved issues with an owner and deadline. A slightly awkward heading may wait. A broken checkout should not.
12. Launch is the beginning of the evidence
Once the site is public, you can observe how it behaves in the environment that matters. Plan checks for the first working day, the first week and the following weeks. Review errors, enquiry delivery, transactions, customer feedback and measurement.
For a replacement website, keep an eye on redirects, missing pages and search performance. Google’s migration guidance explicitly includes monitoring traffic on old and new URLs and investigating problems such as incorrect redirects or lingering indexing blocks.
Do not declare victory, or disaster, on the strength of a tiny amount of data. Compare results with an appropriate baseline and investigate changes in context.
Also complete the handover. The business should know who owns the domain, hosting and essential accounts, who maintains the website and what happens when support is needed. A successful launch leaves people informed. It should not leave the owner holding a password spreadsheet and wondering which of the twelve subscriptions keeps the lights on.
Where we can help
You should not need to become a developer, SEO specialist and analytics technician simply to feel confident about launching your website. You do need somebody to connect the details to the business outcome. That is where we can help.
At Results You Can Measure, our focus is on making your website useful to your customers and accountable to your business, not merely presentable at the sign-off meeting. We can help review launch readiness, identify gaps and coordinate the practical work needed to address them.
That means looking beyond the homepage: customer journeys, enquiry handling, search visibility, measurement, technical checks and the responsibilities that continue after launch.
If you already have a designer or developer, this need not replace their work. It provides a clear basis for asking the right questions and agreeing what “ready” means. The outcome should be a prioritised plan: what must be fixed, what can wait and what needs monitoring.
Download the website launch checklist
To make this practical, we have put together a downloadable website launch checklist. It covers the work before launch, checks on the day and follow-up afterwards, including all 20 technical SEO items, with space to record owners, results and evidence, plus a launch decision record for the go/no-go call.
Use it with your designer, developer or internal team. It is a starting point, not a universal certificate of readiness: an ecommerce business, a consultancy and a membership platform will need different levels of testing.
Before you press publish
A website does not need to be perfect before it launches. It does need to be ready for the job you are asking it to do.
That means customers can use it, enquiries reach you, important search foundations are protected, measurement is meaningful and somebody knows what to do if things go wrong.
Good design creates the opportunity. A considered launch helps you make use of it.
If your website looks finished but you are not sure it is ready for business, contact Results You Can Measure about a pre-launch review. Let’s check the important things before your customers check them for you.
Related services
- Web Development for sites built to pass these checks from day one
- SEO for the search foundations, redirects and structured data
- Hosting and Maintenance for the backups, updates and recovery planning that continue after launch
FAQs
When should launch testing start?
Well before launch day. The business and journey checks can run as soon as real content is in place, and the baseline of your existing site should be captured before anything changes. Launch day itself is for repeating the critical tests on the live site, not discovering new problems.
Who should own the website launch checklist?
One named person, agreed in advance. They do not have to run every test, but they collect the results, chase the gaps and make or escalate the go/no-go recommendation. A checklist without an owner is a wish list.
Does a redesign need the same checks as a brand-new site?
It needs more. A new site has nothing to lose; a redesign can lose rankings, links and landing pages that took years to earn. The baseline, redirect mapping and post-launch monitoring sections exist mainly for redesigns.
What are the genuine launch blockers?
Anything that stops the website doing its commercial job or exposes the business: broken enquiry or payment journeys, private data publicly reachable, accidental search blocks on priority pages, or no tested way back to the previous version. Cosmetic snags get an owner and a deadline. They do not hold the launch.